
Bigsby Part One –
If you’ve ever got (or thought about getting) a tattoo, you can probably remember the heated debate that went on in your head. What should it be? Where should it go? How much do I want to pay? Will I even want to look at this 30 years from now?

Any form of permanent modification should be something that is long thought out, and carried out by someone who knows what they’re doing. The same can be said for modifications done to guitars. While just about anything is possible to change or fix, just about anything is possible to mess up too.
In this article I’ll go over the process I use to put a little “spring” in your “string”, to change “still” to “thrill”, and move from “turf” to “surf”. This one’s all about the Bigsby tremolo system, and how to add one to your guitar.
The Bigsby was perhaps the earliest iteration of the now widely known “whammy bar”. It works by wrapping the strings around a cylindrical bar, which is then rotated by pushing a lever or “arm” down to loosen the strings. This creates a drop in pitch. A raise in pitch can be achieved by lifting the arm, thus rotating the bar in the opposite direction to tighten the strings.
With proper installation, you will have a great working tremolo unit that keeps your guitar’s tuning very well. The Bigsby is not meant for extreme drops or raises in pitch, but rather subtle vibrato.
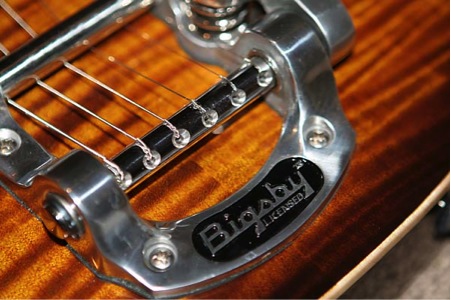
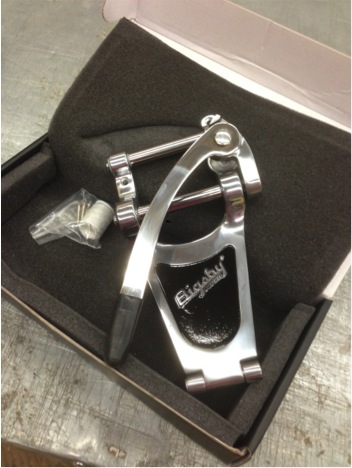
The first thing you’ll need to do is figure out which Bigsby hardware model you want. There are various types, some that come attached with a tailpiece and some that just fasten right on top of the guitar. This decision is mostly based on aesthetic appeal, but make sure there’s enough room on your guitar’s body if you want a larger Bigsby. For hollow body guitars, find out if you have a center block inside the guitar that you will be able to mount screws to. If it does not, you may have to go with a tailpiece Bigsby such as the B70, or B3. Here’s a picture of a B70 followed by one of a B50 that mounts directly into the face of the guitar’s body:

Some guitars feature a tail piece that is drilled into the face of the guitar’s body. If you’re absolutely set on installing a Bigsby on this instrument, keep in mind that you will either need to try using a model like the B70 or B3, or be willing to cover up those unsightly holes left after the installation.
Another thing to keep in mind when making your purchase is that standard guitar bridges are not always designed to function with tremolo units. The strings will tend to catch onto the saddles and just push and pull the bridge as you use the tremolo arm, affecting intonation and just making things sound rigid. It would be a good idea to invest in some kind of “roller bridge” (like the one in the following picture) to allow proper use of your Bigsby:
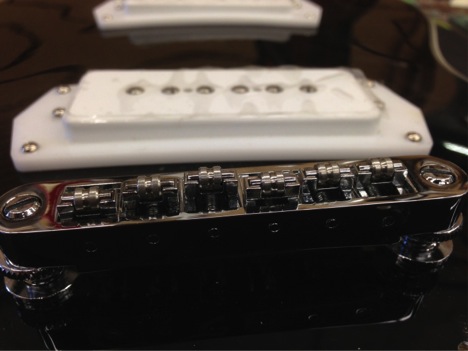
Alternatively you can use a set of files to lightly file out the grooves in the saddles to “round” them a bit. It won’t work as well as rollers, but it’s better than nothing!
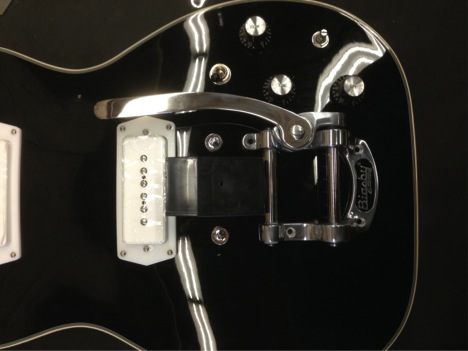
Let’s get the process started. Once the strings are off, you can begin by swapping out the bridge if you have one. Ideally you will have one that fits the old bridge posts. Next you can remove the guitar’s tailpiece to get ready for the new Bigsby. For this example I’m installing a B50 Bigsby to an Airline Tuxedo with center block.
Alignment
Typically your new Bigsby will come with an “alignment string” that you can use to ensure your Bigsby is set properly. For full instructions on how to use it, check out their official install instructions at www.Bigsby.com. The following are the steps I take and some tips you can use in addition to using this string, or without it.
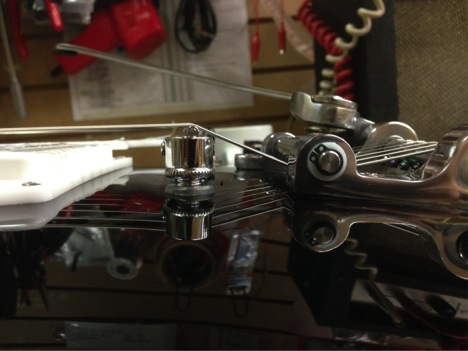
It’s important to first place the Bigsby in a spot that looks right to you. Set it on the body, and look at it from different angles. Does the arm sit in an accessible spot? Is it too close to the controls for your liking? The distance you place the Bigsby from the bridge makes a difference. The closer to the bridge, the steeper the angle from the saddles to the Bigsby. Too close, and you risk having too much pressure on the bridge resulting in it being pulled backward and affecting intonation, as well as poor tremolo functionality. Too far and you simply won’t have as much tremolo control. This can also risk not having enough string pressure on the bridge (when set low), and potentially cause strings to pop out of their saddles when plucked. Here’s a look at what a close B50 placement does to the string angle VS a further B70:

Keep in mind that some bridges (like the one I’m using for this example) are placed on an angle for intonation purposes, and it’s easy for this angle to deceive your eyes. You want the Bigsby to be aligned with the guitar, not the bridge. For this reason, I remove the angled bridge from the posts when first placing the unit.
With the bridge removed, placing a straight-edged block that is sized correctly up against your bridge pickup cover can solve both the straightness issue and distance issue as seen here:
You can cut a block out of wood to use for this purpose, or find something of a good size like I did here.
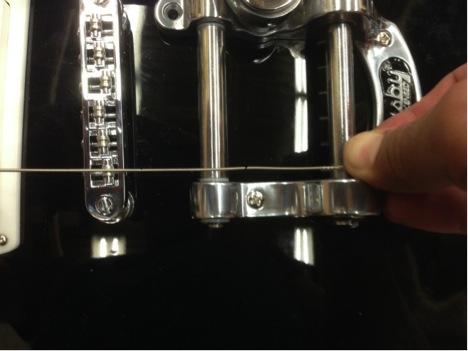
Of course, distance and straightness aren’t the only factors that come into play when lining up the Bigsby. You want to make sure the strings travel straight from the bridge to the Bigsby string pins. With the bridge back on the guitar, hold a guitar string across the Low E string saddle down to its appropriate pin. Confirm that the string remains straight for this distance. Repeat this process for the High E string, and make any side-to-side adjustments of the Bigsby necessary.
It’s a good idea to repeat this process a few times – adjusting the Bigsby straightness and distance, then the straightness of the string from saddle to pin before getting ready to drill. Once you’re completely satisfied, it’s on to the next step!
That’s it for part one. Next time, I’ll go over the preparations for drilling, the actual drilling, and finally, perhaps the most difficult part: the stringing of the guitar once the Bigsby has been installed!
Happy Playing!
Well, an even easier, not all that costly, and reversible mod for a Bigsby is the Vibramate System. Honestly, you can’t go wrong and do not need to worry at all about alignment. It slaps on and then you mount the Bigsby to that.
Just sayin’, is all.
Well, an even easier, not all that costly, and reversible mod for a Bigsby is the Vibramate System. Honestly, you can’t go wrong and do not need to worry at all about alignment. It slaps on and then you mount the Bigsby to that.
Just sayin’, is all.
Oh, and check out their Vibramate spoiler! Greatest guitar innovation in years!