

For every guitar player there comes a time where a guitar they know and love gains a new “battle scar”. Whether it be from a fall, a knock, your pick, your belt, or a throw, signs of wear and damage appears that you can choose to try and have fixed, or leave as a story to tell.
Occasionally, damage can occur that will require a fix. Today I’ll be going over the steps to carving and replacing a piece, that, if damaged, can render the guitar unplayable. Not only that, but simply changing it out for something made of a different material can have a major impact on your tone and sustain.
Replacing a Guitar Nut
Small cracks and chips in the nut can grow to the point where you literally lose a piece of the nut. Improper filing can cause strings to sit too low to the neck or too close to each-other. While filing nut slots and gluing pieces back together is possible, there comes a time to consider putting in a new one. You can get pre-fabricated nuts, but in order to have one that is fit specifically for your instrument, you’ll have to cut it yourself.
Before you begin, you’ll have to…
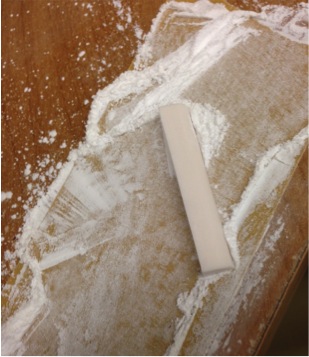
1) Take off the old nut.
Here I am using my fret hammer and fret setter to gently tap the nut out of its seat. Note the lacquer that curves up towards the front of the nut – it may be wise to carefully score along the edges with a modelling knife to prevent chipping the paint. If the nut doesn’t move at first, don’t smack it. Keep tapping gently until it comes loose.
With the nut removed, you’ll want to file off the remaining glue to make sure you’re gluing the new one to the original wood slot. Once the area is clean, you can start work on the new piece!
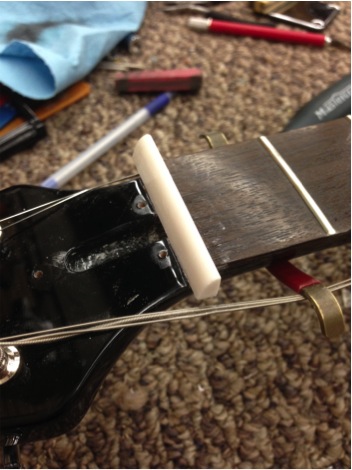
2) Fit your nut blank into the slot.
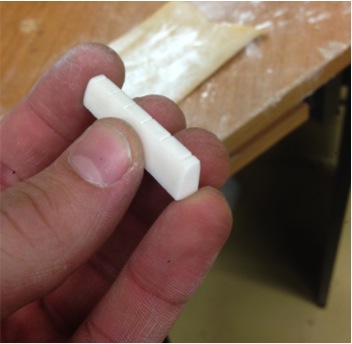
The first thing you’ll need is a nut blank of a material of your choice. Nuts come in all kinds, but for tone quality and ease of carving, I would suggest going the route of bone or TusQ (synthetic material made to mimic the density of bone.)
Success! A new nut!
Not yet. Obviously this blank is too long and wide to fit in the slot, so there is lots of work to be done. First things first, you’ll want it to at least fit in snuggly. Sticking a piece of sandpaper (110, or 220 grit if you want to take it slower) to a flat surface, sand the flat side of the nut that meets the fingerboard until it slides in so it is flush at every edge. Make sure you check periodically so you don’t overdo it.
As you can tell, a lot of nut material had to come off of this one to make it fit! Once it did though, it was nice and snug…
 3) Size it up.
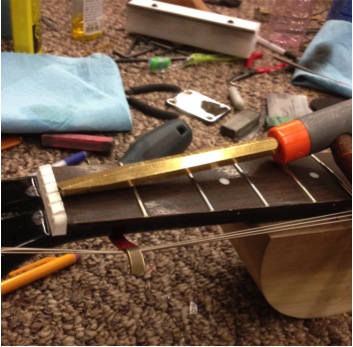
With the nut in place, you’ll want to make all your guidelines and measurements necessary so you’re confident when it comes time to cut. The first thing you’ll do is just trace the contours of your fret board onto the nut with a sharp pencil.
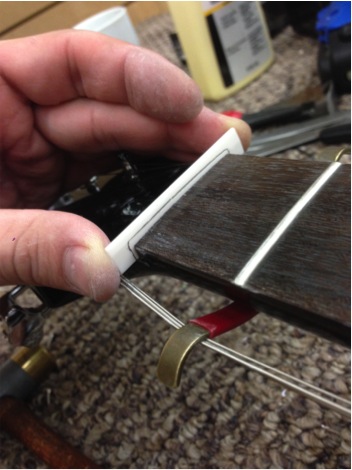
So, this is the outline of your fret board. For the actual nut height, you obviously don’t want to shave right down to this line. Next you’ll need to measure the height of your first fret.
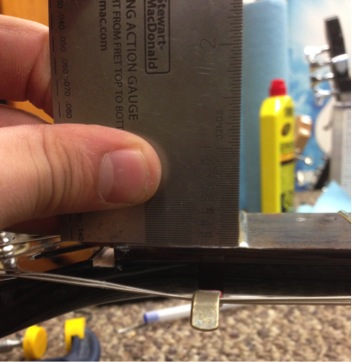
The height I measured on mine was about .034”. To factor in the distance between the top of the fret and the bottom of your strings, add about .030” to whatever your fret height is. This total, (0.064” for me) is how much you want to add to the line you had drawn across the radius of your fret board. This is how far you can now file or sand down the top of the nut, while using the fret board radius line as a reference point for shaping a radius to your nut.
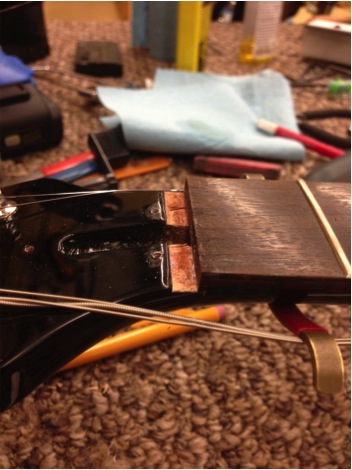
Next you need to mark where you are going to cut your string slots. It is vital that your strings are spaced properly so they are not falling off the edge of the neck, not too close together, and not too far apart. One millimeter off is noticeable when playing, so make sure you repeat every measurement until perfect.
The first two strings you’ll mark will be the outer E strings. Instead of measuring in from your markings on the nut, for this step you want to measure in from the bevels of the first fret. Again, you don’t want the string to slip down off your neck when playing. A general rule is to make your mark 1/16” in from the fret bevel on each side.
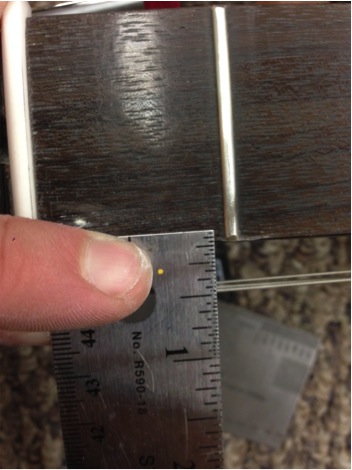
My ruler here isn’t marked in inches on both sides, so the best way to accurately get this measurement was to press the millimeter side right up to the nut, and use the edge to measure 1/16”. Make sure your nut is placed in the slot so your pencil marks line up with the fret board contours before you mark your lines.
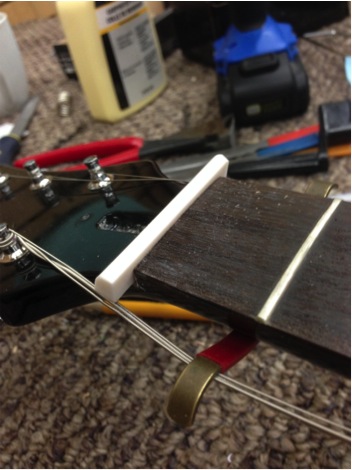
Once you’ve got these two outer lines marked, you need to draw on the remaining four. The absolute best, and easiest way to do this is to use the “Stewmac String Spacing Rule”
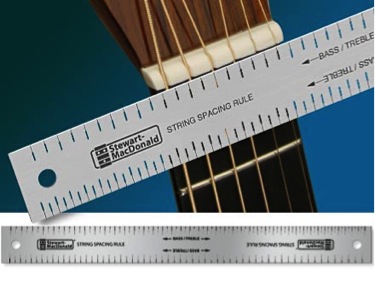
It works with a few different slots in a ruler that you basically just have to line up with the two lines you’ve just drawn. When you find two that line up, the lines in between are pretty well placed for you.
The alternative approach would be to measure the distance (in mm) between the two marks you just made, and divide it by five. For my nut, this would have been 38 divided by 5 to give me 7.6. This number is the equal distance between each string. The trouble with this method is that, of course, some strings are thicker than others, and in order to be exact, you would need to factor that into your equation. You can get pretty good results without doing that, but it’s very time consuming and there is a lot of double checking involved as you make your cuts. As you may be able to tell from the picture, I didn’t have the “string spacing rule” on hand and went without, all the while wishing I could’ve used it!
Cutting the slots.
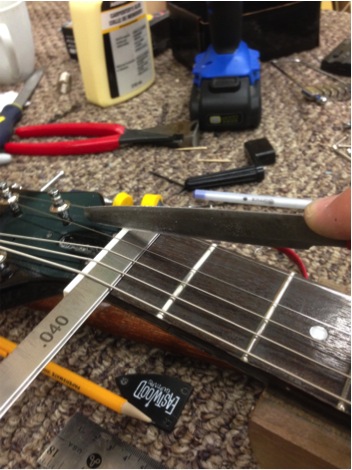
When your pencil marks are all in place, you can begin to cut your guide slots. Clamp the nut into a vice, and using your thinnest nut file cut starter grooves along each line. Go slow to ensure you don’t slip!

With small cuts made, you can use your sized nut files to cut the correct sized groove for each string. Don’t cut too far down yet, just enough to allow the string to sit comfortably.
Next, you can place the nut back in its slot and place the strings into their respective groove. Check to make sure everything looks good as far as string spacing and height from the first fret. This is the part where you’ll either breathe a sigh of relief or mumble a curse of frustration.
If everything looks good, you can cut your nut slot depth. Take the measurement you used before that was your fret height plus .030”, and stack up some feeler gauges to total that number. Place it along the side of the nut, and file each slot down with the proper sized file until it touches the feeler gauge. Make sure you file in a downward motion towards the headstock to allow for a natural slope of the string.
Shaping, polishing, and gluing!
It’s almost done! If you breathed that sigh of relief before, don’t think it’s easy sailing now though. Be cautious making the next few steps to completion.
From here, you can shave off the edges of the nut up to the original lines you made around the finger board, and then contour and polish the nut with increasing grits of sandpaper (I used 220 followed by 320). After sanding, you can polish it with a general polishing compound. I like a product called “ScratchDoctor”. When all’s said and done, you should have something that looks like this:
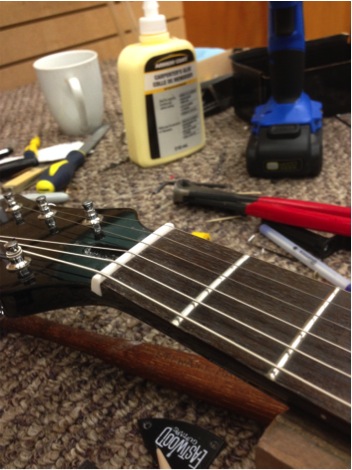
Lastly, you can glue it on to your guitar! Just a few dabs both in the slot and on the nut will do. No need to lather it all over. When in place, put the strings into their slots and tune up to pitch, wipe off any excess glue, and let it dry.
Voila, a new guitar nut:
Happy Playing!
This post provides clear idea for the new users of blogging, that actually how to do running a blog.
Good answer back in return of this query with genuine
arguments and telling the whole thing on the topic of that.