
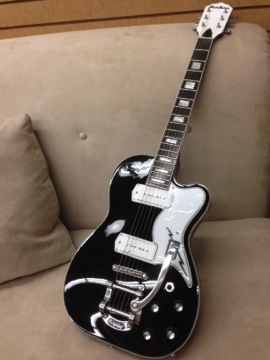
BIGSBY PART II: – Issue ten finished off after giving tips on how to properly align a Bigsby unit to the body of your guitar so that it not only looks great, but works great too. Now it’s time to get the tools out to mount the piece, and then restring it to finish the job!
A wise man once said “measure twice; cut once”, and the same goes for drilling holes. Placing the Bigsby in the right spot will have been all for nothing if you slip, and either scratch the body or drill in the wrong spot. It’s for this reason that I’d like to back up a bit. If you’re worried about ruining the finish, you may want to tape off the body where you’ll be drilling before lining up the Bigsby. In my photo example here I marked my drill spots on the body of the guitar, then covered them with tape.
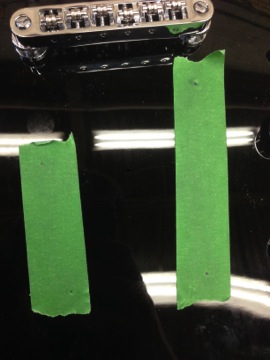
This works if you want to save tape, but it means you’ll have to line the Bigsby up again and re-mark your drill spots on the tape.
Whichever route you go, you’ll need to use a thin marker to slip in the middle of each screw hole you see on the Bigsby. With the marks in place, you’re safe to make your pilot holes! From here on out, the installation of the Bigsby is simple – but you’ll still have to be careful with the drill no matter how much you’ve taped up your guitar. Be sure to use a drill bit that’s smaller than the screws provided, and start off slow. As a final confirmation of alignment, after you’ve drilled the first hole, screw the Bigsby down to just that one hole. From here, you can still rotate the Bigsby if it may have tilted a bit during the drilling process. After you’ve made any necessary corrections, you can safely drill the rest of the holes and fully attach the Bigsby to the guitar.
The first time I added a Bigsby unit to a guitar, I found the stringing process to actually be trickier than the installation! One thing you may wonder is when to put the included spring under the arm. It’s really up to you, I’ve done it both before and after stringing with relatively similar ease. The benefit I find with adding it after is that the pins you loop the string ball ends over are slightly easier to reach without the spring.
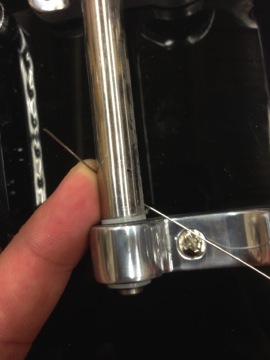
To start, bend the string at the tip. This will allow you to thread it easily underneath the rotating bar without scratching the finish:
From there you can pull the string all the way through until the ball end lines up with the bar with the string pins. Now you can bend the string again at the ball end, to make it easier to loop it around the bar:
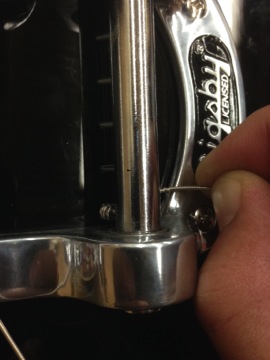
When you’ve got the ball end on, it becomes a game of tension. Unlike a guitar bridge, the pin is not going to just hold the string on unless you pull hard on the string until it’s tuned up to pitch. You may want to physically hold the ball end to the pin with your finger until you can get a good grasp on it.
The first time you do this modification may take a while, and the stringing process definitely takes some practice. After you’ve done it once though, you’ll have no problem doing it again. With a little bit of research and know-how, you can make all sorts of changes and upgrades to an already great instrument. I hope you can take something away from this article, and perhaps even gain the confidence needed to turn this:
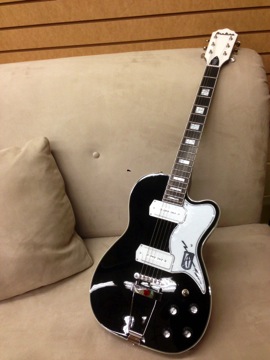
into this!
When installing a Bigsby, I’ve found it’s best to put expandable brass inserts into the top and use machine screws to fasten rather than wood screws — for strength and sustain. The inserts are threaded on the inside and have ribs or tangs that expand out when you thread the machine screw in. They are available from: http://www.mcmaster.com/#brass-inserts/=uf5p58
I use those little foam triangles that the ladies use to apply makeup to hold the string end on the Bigsby pins. They provide enough support and don’t mar the finish.
Nice article, I recently bought an Eastwood that had been modded with a proper Bigsby, it’s nice but I hate the up-pitch when using it, and find it difficult to control – is there a way of blocking them to stop up-pitching?
Whether you are stringing a guitar with a Bigsby or not, it’s much easier to use a capo. Thread the ball end through the tailpiece hole or mount it on the pin on the Bigsby. Pull the string through to it’s full length along the fretboard, until it’s taut, then clamp a capo over it. This will hold the string in place while you are attaching it to the tuning pegs.
A small eraser also works great for holding string ends onto Bigsby pins. Basically, all you do the first time is put your ball end over the pin, push the eraser onto the pin, and voila! Afterwards, you’ll already have a hole in the eraser, so it becomes much easier. However, if you find you can’t get the eraser to push over the pin the first time around, a small brad or nail works wonders for making a starter hole. Just don’t make a hole in yourself, because I won’t be held liable for any such incompetence.