
When you receive your guitar back from a reputable guitar technician or luthier, you can expect to be “wowed” by their quality of service and professionalism. It takes years of experience, practise, and a willingness to learn in order to get job after job done well, and on time.
With that said, it would sound wrong for me to tell you that thousands of guitar players around the world complain after their instrument has been worked on by an individual who has had more experience adjusting guitars than any other technician in the world. In fact, she’s so bad that every single instrument she graces with her finesse ends up needing to be worked on again to fix what she’s done. The worst part? She may be working on your guitar as you’re reading this.
We all know her as Mother Nature, and if you’re just entering into your winter season like we are here in Canada, you’d better keep a watchful eye on your prized six strings.
Changes in temperature and humidity will do a number on your guitar if you don’t store it properly. The cold, dry season of winter is not the best climate for any stringed instrument. Not to mention, flipping on your electric heaters at home only make the problem worse. Investing in a humidifier to put in your guitar room is a worthwhile purchase, and mini humidifiers are available to carry around in your guitar case. Storing your guitar properly is a good way to avoid potential repair and setup costs; repairs such as the one I’m writing this article about…sharp fret ends.
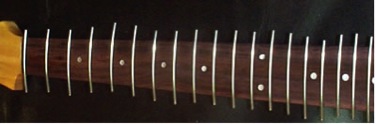
A sharp fret is the result of the moisture content in a guitar neck’s wood decreasing due to dryer climates. A lower moisture content means that the wood will literally shrink, causing the frets to stick out over the fingerboard edge. This of course means it will be very uncomfortable to play, and in extreme cases, you can actually cut your hand.
To remedy this, you’ll need to file the fret ends down to size. This is a delicate task, since you:
- Want to get rid of any “fret overhang”
- Want all the fret ends to look good, and look the same
- DON’T want to damage the wood.
Below is my method for taking care of your sharp frets.
First, you’ll need a flat file to get all the protruding edges filed back into place. The best, safest tool you can use for this in my opinion is one such as this:
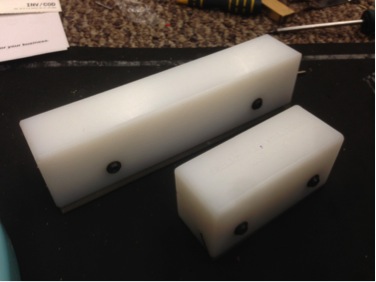
These are “Fret End File Blocks” that have a flat file mounted inside them at a pre-set angle. This ensures that every fret will be taken back the same distance, at the exact same angle. The danger of trying to file back the fret ends manually (without experience) is that you risk slipping and damaging the neck, and it’s possible to file the bevels at too steep an angle. Not to mention, it can just take a really long time! If the fret begins to slope too near the strings, it’s a lot easier for the string to slip off the neck when playing. Most block angles are pre-set somewhere around the 35-55 degree angle range, with 45 degrees being a good midpoint. Many are adjustable so you can set an angle you want.
The method to using the file block is relatively simple. Remove or loosen off the strings, place the tool on the neck and slide it back and forth. Don’t push too hard against the frets, the tool will do a good enough job on its own. It is good practise to set a number to count how many times you slide it back and forth (say, five to start) and stop to check the frets between each set.

When you’re done this process, you may feel that the frets still feel sharp. Make sure that you are feeling the fret from the bottom of the fret as opposed to side to side. A fret that feels sharp from side to side but not from bottom to top means that you’re done your job with this flat file, and it’s time to move on to the shaping file.
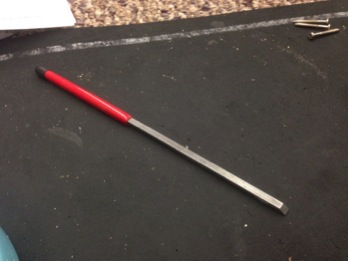
This fret end file is the tool to use for smoothing out your beveled edges. You can use a three corner file, too – just be sure that at least one side is ground down flat and smooth. You need to be able to glide this file along the neck, so a file that has grit on each side is just going to end up tearing the wood.
With the flat side of the file against the finger board, place the file against the fret’s beveled edge. You want to use the length of the file, so place it where the fret meets close to the tip of the file.
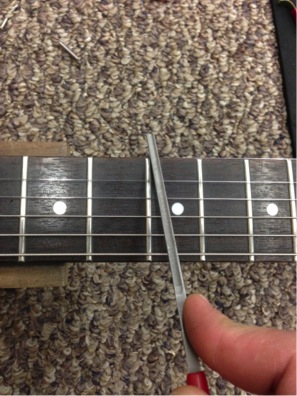
The method you’ll want to use here involves a couple different motions with your arm and wrist. You’ll be sliding the file forward:
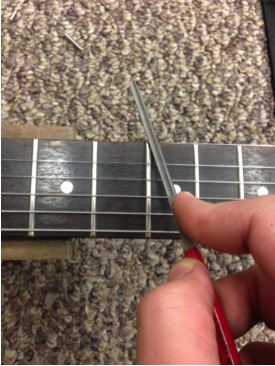
… while also turning the file inward, and curving or “rolling” it over the fret end. It’s kind of similar to turning a door handle while pushing the door open.
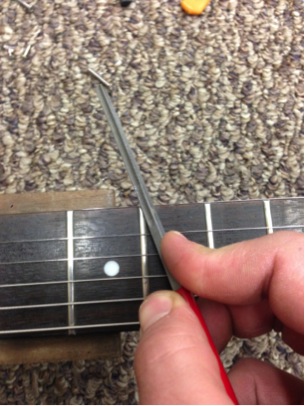
Only slide the file in one direction, and again count the number of times you file. Start with three strokes on each side, then check the fret end. You should have something that looks similar to this when all’s said and done:

The last step is to buff and polish the frets to get rid of any file marks you’ve just made. For this, I find a rotation of “fret erasers” from stew mac do a great job. Start with the lowest grit, then work your way up to the highest. You can use sandpaper as well, but for that you’ll want to put some tape down to protect the fretboard. If you go this route, you shouldn’t need anything abrasive – maybe just 400 grit to start, working your way up to 600. When you’ve finished with that, a quick polish up with steel wool will make the fret look fantastic.
That’s it! It takes a bit of practise, but your hands will be thanking you the next time you slide them down the neck!
Happy Playing!
nice article March 2 2015 winter is over, should have put this out in Sept.2014…..
Prices