
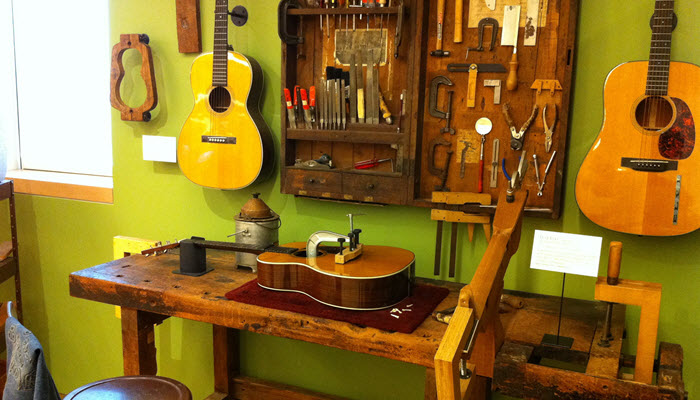
If you’re reading this, I’m sure you’ve heard or said the phrase “this guitar’s action is too low/high!” It either buzzes all over the neck, or it’s a pain just to fret a note. The reality is… Guitar parts move. With a piece of wood that’s constantly putting up with over 100 pounds of string tension, it’s understandable. Living here in Canada where the weather and humidity is ever-changing doesn’t help either!

Often times, a guitar’s poor action is fixed with an easy twist of a truss rod like I explained in my “neck relief” article. However, adjusting the truss rod should not be the primary source for fixing your string height! The guitar is built bearing in mind that the neck will be set properly. Putting too much relief in the neck in order to raise string height can lead to problems elsewhere, so it’s important to set the neck well and then adjust your string height at the bridge. To find a height that works for you, there’s no harm in experimentation! Try setting the bridge to where it’s uncomfortably low, and gradually raise it until you’re happy with the playability. Personally, I prefer to use a measurement tool to quickly dial in a height that I know I’m comfortable with. The “string action gauge” from Stewmac has everything you would need. The bottom of this tool has markings that go up in increments of ten thousandths of an inch beginning with .010. Placing this edge down behind the low E string, the distance from the fret to the bottom of the string should be around .075-.078, so, between the .07 and .08.
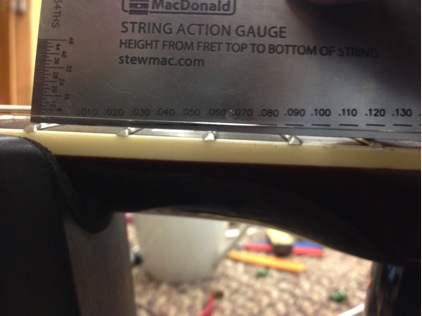
On the other side, again place the edge down behind the high E string. The distance I go for on this side is around .063-.065, or, you should just see the .06 marking peaking out underneath the string. The numbers I’m using here are for guitars around a 25″ scale length, assuming standard tuning, and neck relief set similarly to how I described in my neck relief article. From here, you can make minor adjustments to suit your needs! If at this point you are still experiencing fret buzz in certain areas, your neck or frets may need some extra work in order for the guitar to set up well. Sometimes the strings may be too hard to push down in the first fret, or may even play too sharp! It is not uncommon for the nut slots to be cut too shallow. With the right tools, this is an easy remedy. You’ll need a set of files, sized correctly for each string. You don’t want the slot to grab and choke the string, so you actually want to use a slightly larger gauge file than string gauge. As a general rule, try to go .003″ larger. So, for a .010 high E string, a .013″ file would be fine. Some stores offer double edged files that are marked 1-6 instead of a gauge – be sure you know which gauge they are before cutting!
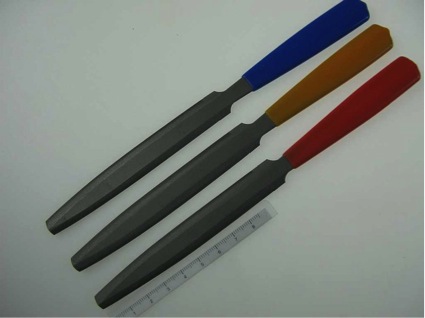
In some cases the number may not necessarily pertain to the string slot you are trying to cut.
The other 2 tools I use are a straight-edge, and a set of feeler gauges to measure the height of your first fret. The idea is, of course, to not cut your slots too deep!
Remember to make sure your neck is set before making your nut adjustments. If you cut it with an over bowed neck, you run the risk of having open-note fret buzz once you straighten it out again.
Laying the straight edge down across the first two frets, try sliding different combinations of gauges underneath until you find a combo that just contacts the straightedge.

Let’s say .040 is the one that worked. Now, you want to add ~.005 to that number to make .045, find the two feeler gauges that total this new number (or close to it), and use them as a “shield” when cutting your nut.
In this case, I took size .022 and .024, stuck them together, and lay them flat on the fingerboard against the nut. Then, I cut each slot with the correct file until making contact with the feeler gauges. It’s a quick and easy way to get your proper nut height set without having to worry about going too low!
After you’ve got your neck set, your string height at both the bridge and nut set, and your intonation dialed in, you should be ready to play!
Happy playing!
Written by: Vince Schaljo
Dear Sir,
I have a particular Project with a few friends about the ancestries of the Ukulele: The Machete.
It´s a Virtual Museum in homage to a relative of min. He was a collector and musician.
The Machete is for me the most important, but I am interested in all instruments from Madeira Island (Portugal) And instruments from Portugal. I see that I have an portuguese guitar XIX century?
Can I ask more fotos of the instrument? It´s for sale? Please let me know.
I have already a few good instruments from the XIX century.
You can see it on:
http://www.museuapa.com
With clicking on Instrumentos, you go to the page of the Machetes, and Machetinhos.
http://www.museuapa.com/instrumentos/cordofones/
The Machete number 6 and number 9, is an Machete and Machetinho respectively, built in May 2012 by Maker Carlos Jorge Pereira Rodrigues, that is the only Maker in Madeira that still making Machetes, Machetinhos, Rajao, and Viola de Arame with original woods fro Madeira and original forms.
I am very interested on buy this kind of old and antique instruments, or any Madeirian Instruments.
If you have any for sale, or know anybody that have it, please let me know.
Please feel free to ad my website to your contacts . Will apreciate.
Thank you in advance.
Sincerely,
Norberto Gomes