

Before you set out on your mission to level your guitar’s frets, the fret rocker was swaying like a baby’s cradle all the way up and down the neck. Now, your baby is fast asleep as the tool stays straight as an arrow no matter where you position it on the fret board. You’re nervous about disturbing its slumber with even one more small stroke of a file, potentially ruining all the work you’ve just put into getting it level. So, what if I told you now that the next step would be to use another file to go across each fret individually before the guitar will be ready for playing?

Well, that’s what I’m telling you! But don’t worry; the process is rather painless, and as long as you use the right tools and follow this guide, you’ll have your frets properly crowned and polished in no time.
First off, what does it mean to “crown a fret” and why is it necessary? If you look at your recently levelled frets, you will notice they appear very flat on top with tons of horizontal scratch marks.

This is not a good thing because: A) it is not very visually appealing, B) the strings will scratch up and down the fret when you bend, causing a “nails on chalkboard” effect, and C) the strings will contact too large a portion of the fret, causing your intonation to be off.
When a fret is installed, its intent is for the string to contact the center of the fret and not such a large surface area. What crowning does, then, is shave off the edges of the fret to make it round on top, or at least leave a very fine flat surface down the middle. The idea is not to take a bunch more fret off the top, but instead to just round it out. You don’t want to make all the time spent levelling a waste! Here’s some things you’ll need:
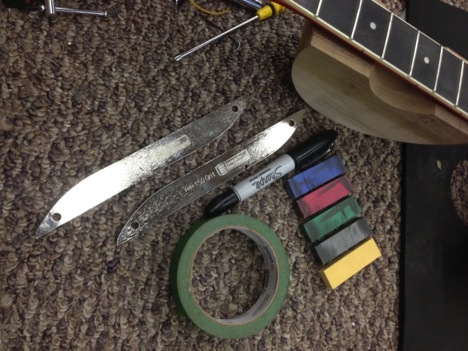
(From left: Diamond crowning files, sharpie, fret erasers, masking tape)
The crowning files shown here are a tad expensive, but I find they work the best for me. There are plenty of other options out there that don’t cost you an arm and a leg. I tend to use the 150 grit as it gets the job done faster. Note: these files are double sided, each side shaped for a different width fret.
As I stated in my last article, it’s a good idea to use masking tape to tape the fret board between frets as a backup in case you slip. To save tape and time, just use two pieces and move them from fret to fret as you work your way up. I didn’t use tape for the following photos.
To begin, mark off the entire length of each fret with your sharpie like so:
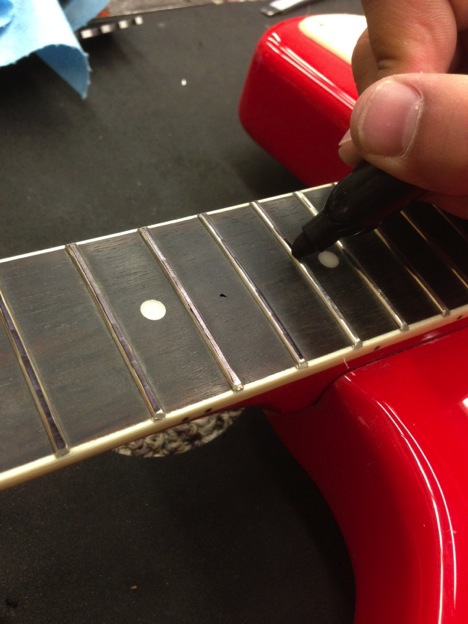
(sorry about the black mark on the fretboard, there’s a chip on my camera lens.)
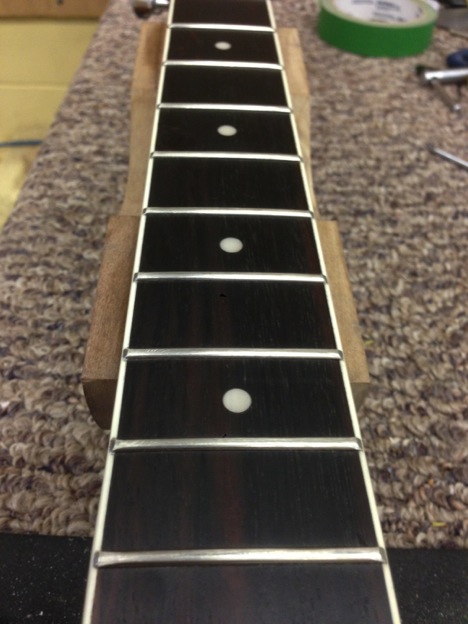
The marker will serve as a template for when you start to file. When you file each fret, watch as the thick marker line gets thinner and thinner. When you’re left with a very fine line down the center that’s barely visible, you know that the fret has a nice crown:
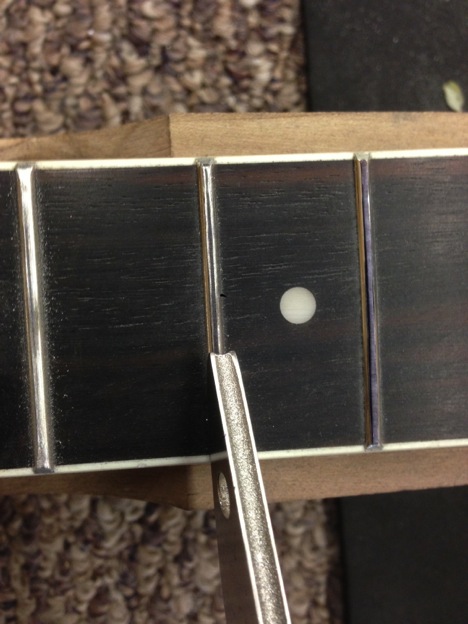
Continue this process all the way up the neck, and you’re done crowning! When you’re finished, you’ll have something that looks like this:
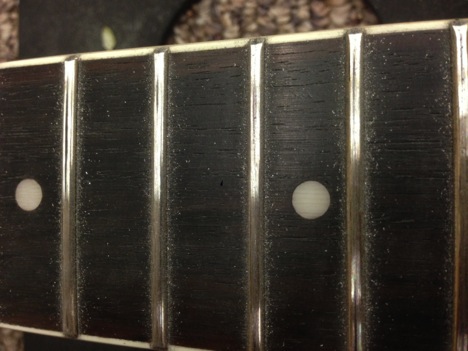
Before you string up the guitar, it’s a good idea to use those fret erasers to polish up the frets, followed by some compressed air to get rid of the fret filings and residue left over from the polish.
The “fret erasers” from Stewmac are good because they’re colour coded depending on the grit they are. The best is to use a combination of a couple different grits for each fret; I like the green #600 and the yellow #1000. Steel wool is a good alternative for this step.
After you’ve polished the frets, you can clean the fret board and give it a nice dose of lemon or linseed oil, and your fret board should now look something like this:
All that’s left to do now is string it up, and have fun!
Happy playing!
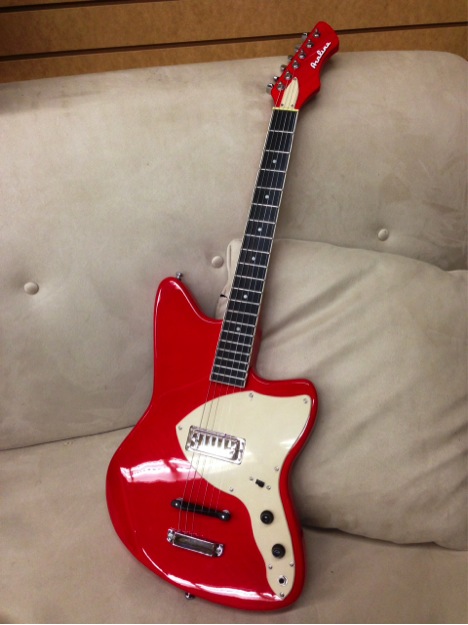 Airline BOBKAT: http://www.eastwoodguitars.com/airline-bobkat-red/