

Hey, fellow Guitar Nuts, consider your humble strap buttons. Where would we be without them? Well, for one thing, we’d probably all be playing our guitars and basses while sitting down rather than leaping about while wildly wind-milling power chords. In summary, while some incredible guitar playing can be performed while seated, to (almost) quote Dires Straits’ song The Sultans of Swing: “It ain’t what we call rock and roll!”
As with so many other things, the best way to show the importance of strap buttons is to look at what happens if they simply aren’t there, or if they don’t work correctly, or when they aren’t where they should be. The consequences include dropped guitars and resulting damage to headstocks, necks, bodies and wallets. Conclusion: strap buttons are pretty darned important.
In future articles, I’ll spend more time on guitar design theory and how to best position a strap button from the start to maximize playability, comfort and balance. Right now, although the issue of positioning or re-positioning a strap button will come up, I’m going to focus on strap button issues in the context of collectible guitars. This is important because strap button-related issues are among the most common concerns when it comes to what should or should not be done to a collectible instrument.
First and foremost, you have to know what to look for as to whether an instrument has its original strap buttons in their original places. If you’re not sure, my usual recommendation (for just about anything) is that you deal with a reputable and knowledgeable seller and keep your trusted guitar tech in the loop. In addition, because we want to make you a Smarter Guitar Nut, you can educate yourself on this subject pretty quickly since there is abundant information on-line including pictures of almost any instrument and numerous other resources such as scans of original ads and vintage manufacturers’ catalogues.
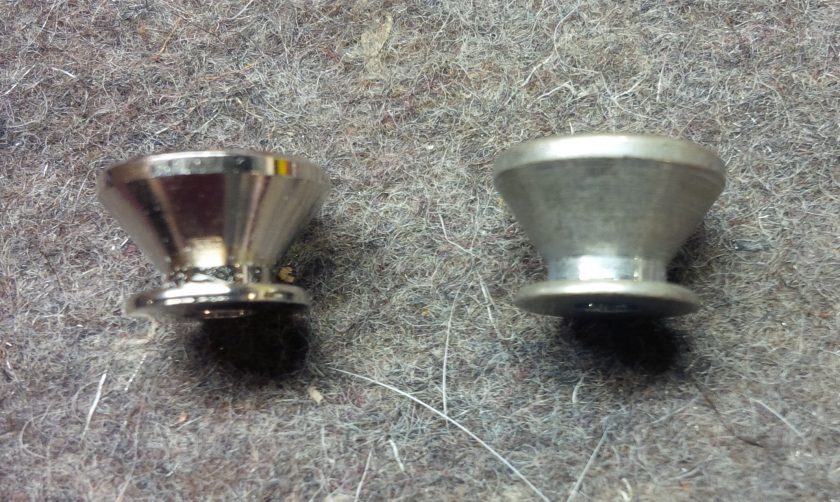
The most common type of strap button, found on many brands including Gibson and Fender. These are easy to obtain including reliced versions like the one on the right.
You’ll notice there’s a pretty limited range of strap button types. Indeed, the most common type is used on the majority of electric guitars including Fenders and Gibsons. If these need to be replaced, they are readily available, including reasonably priced reliced versions. Just to keep life interesting, there are also, of course, a few very unusual types strap buttons and related hardware which, if missing, can be very hard to replace.
Once you’re sure what to look for, you can recognize whether a strap button has been replaced, added or re-positioned. An appropriate, well-installed replacement should- I suggest – not be a concern in terms of collectability and value. The big problems are:
- If a strap button has been added, it means there’s a hole in the guitar that wasn’t there originally. While the strap button is left in place, you can’t see that hole, but it means the button has to stay put regardless of where it is. Worse, if the installation wasn’t done neatly, there might be some additional cosmetic or even structural damage.
- If a strap button has been repositioned, this is a bit more serious because it means there’s now an extra hole in the guitar that might or might not be able to be touched up.
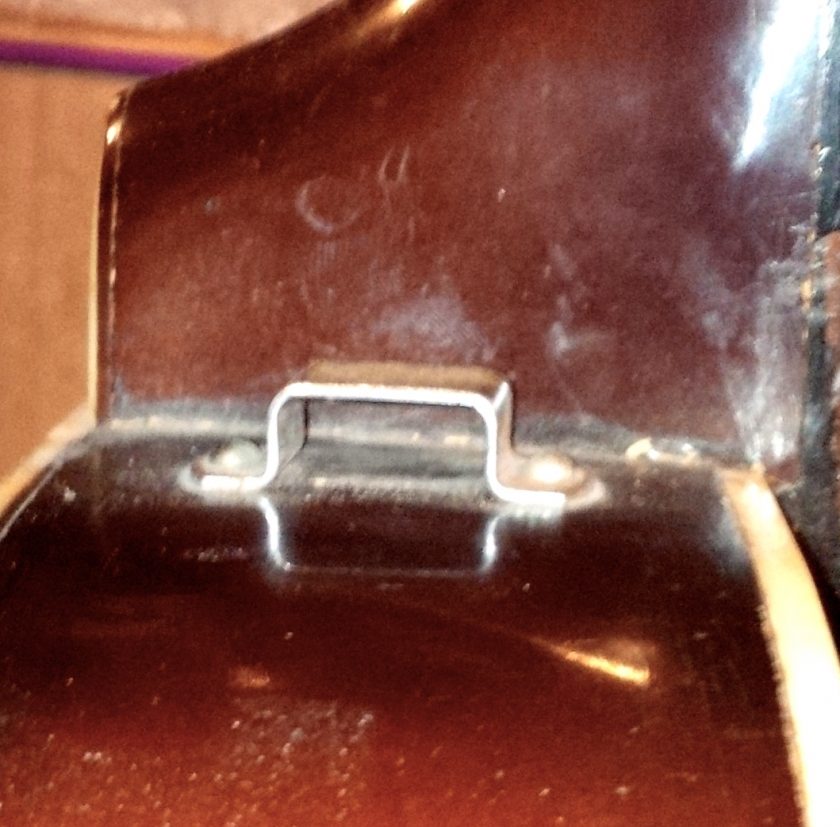
The strap loop on an old Kay Pro bass. If it’s missing, it will be tough to find a replacement.
Serious issues about added or repositioned strap buttons will be addressed in a future column. For now, you need to know two things:
- As a buyer, this is something you need to ask about and as an owner/potential seller it’s something you need to stop and consider before making any changes yourself; and,
- Strap button issues can affect the value of a collectible guitar, whether or not that alteration makes perfectly good sense in terms of improved balance and playability.
If changes or repairs have been or have to be made, you can decide if that’s a deal breaker.
Once you’ve got any issues resolved, if all that’s left is that a strap button is a bit loose, the fix is simple (that is: it’s simple if you’re dealing with a solid body guitar, hollow bodies will be dealt with in the next article):
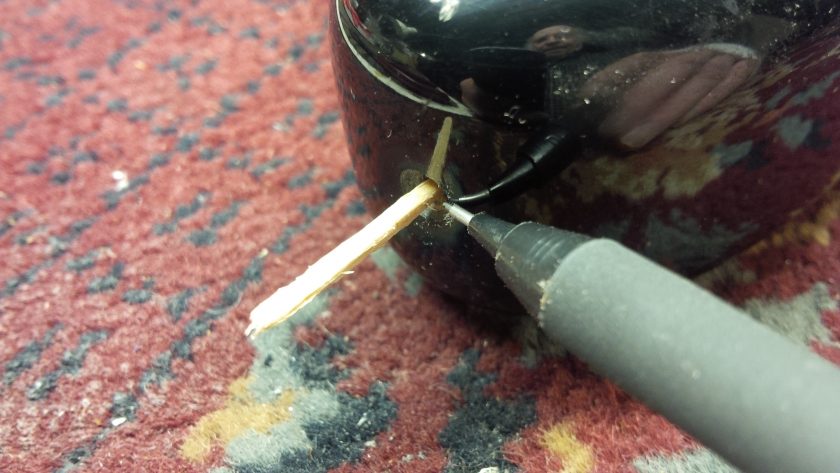
A small piece of dowel, marked to show to show the depth of the screw hole.
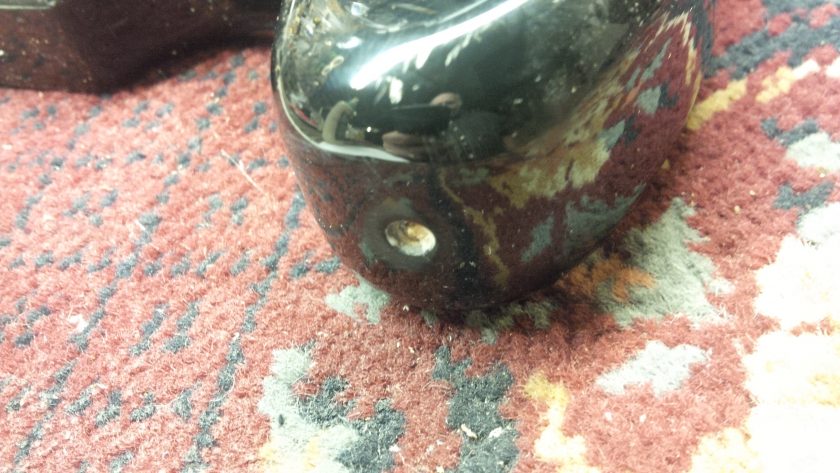
Always wipe off any excess glue.
1) Remove the loose screw and the strap button;
2) Insert a piece of 1/8” dowel (or the traditional piece of match stick) into the hole and mark it to that depth;
3) Remove the dowel and cut it at the mark so it is the same length as the depth of the hole;
4) Coat the dowel with a thin, even layer of glue (white or, preferably yellow…not epoxy or super glue) and push it back into the hole;
5) Then, re-install the strap button.
6) If any excess glue squeezes out of the hole, remove the screw, wipe off the excess glue so none remains on the surface of the guitar and re-install.
An important note here about the term “tighten up”. This always means to turn something just until it stops. It does not mean turning it until it stops and then trying to turn it more with all your might. When tightening any component on a guitar with any tool, the rule is: Don’t force it! There are (almost) no guitar-repair situations where it is a good idea to try to force something to go more than it seems to want to go. If you ignore that warning, things can turn out very badly. How badly? Well, let’s just say there will be a future column dedicated to dealing with broken or stripped screws that remain stuck in places where you do not want them to be stuck.
If you manage to tighten up both strap buttons, congratulate yourself. You’ve just repaired one of the most common issues to be dealt with on almost any guitar. This fix should not affect the value of almost any instrument.
If, after going through the steps above two or three times, a screw still doesn’t tighten up, its hole has to be doweled and re-drilled.
Dowelling and re-drilling a hole is a much more complicated procedure and the typical Smarter Guitar Nut would be indeed smarter to pass it over to his trusted tech. The Smarter Guitar Nut who is a bit more experienced with basic repair work should practice dowelling and re-drilling only on very expendable guitars or on scrap wood. We’ll deal with this procedure in a subsequent instalment of the Smarter Guitar Nut.
Another interesting and, for me, timely column! I have a bass with the sloppy pin syndrome. I was planning to perform M&M’s standard “broken-toothpick-ec tommy” on it, but I think I’ll hold off and try the dowel & glue procedure you’ve outlined. Sounds like a more permanent solution..
Thanks Smarter Guitar Nut!
Fascinating. “Reliced” was a new word for me – I thought it might be something to do with bugs, but I was wrong!