
It might sounds ridiculous to some, but it’s true: some beginner guitarists often don’t know how to replace strings. This quick guest blog will help them out.
Guitar’s strings are usually durable enough to withstand months after they need to be changed, but don’t think that a popped string is the only reason why you should do that. Re-stringing your guitar should be done more often, as you won’t be able to clean the neck, and so on.
Anyhow, “why” you should restring your guitar is another topic, let’s stick with “how”. We’ll discuss several easy steps which will help you learn this crucial guitar maintenance method – you’ll be using it for as long as you play, so you might as well pay attention.
Step 1 – Find a suitable spot where you will re-string your guitar
Plainly put, you could restring your guitar virtually anywhere, but that’s not recommended for beginners. Why is that? Well, every time you take a string off, you’ll also have to put it somewhere where it can (and more often than not “will”) be misplaced, not to mention the hardware.
Apart from that, re-stringing also means “re-tuning”, so, unless you have a tuner handy, you might as well want to find someplace really quiet.
Step 2 – Prepare the tools needed to re-string your guitar
Let’s put it this way – there’s a fast method which simply involves changing of your guitar’s strings, and there’s a thorough method which involves cleaning, tuning, and wire cutting. Depending on which method you want to go with, you’ll need different gear. If possible, go with the “thorough” method whenever you can, as the health of your guitar should be more important than getting lazy.
Anyhow, the list of tools you need is as following:
- Strings – if you’re a complete beginner, you might want to get an extra pair, as you might pop a string before getting the job right.
- A piece of clean cloth – you’ll use this to clean the fingerboard and other key points.
- Wire cutters – unless you want your strings to dangle from your guitar’s head, you’ll want to cut the excess parts.
- (Optional) Guitar Cleaning Tool – most beginners don’t have this tool, which is why it’s optional.
- (Optional) Tuner – There are different ways to tune your guitar, so consider a tuner only if you can’t think of any.
Step 3 – Lay your guitar down on a comfortable surface
Even though it’s pretty self-explanatory, it wouldn’t hurt to mention that hard surfaces are hazardous for your guitar’s neck. Obviously, you’ll want your guitar to be supported by anything soft and cozy – pillows might do the trick (note: most beginners go with the easiest solution – laying the guitar down on the knees. There’s a world of reasons why you shouldn’t do that, but the most important one involves it falling off and getting ruined).
You don’t need to think about anything in particular during this step, as all you have to do is secure the neck without limiting access to other places. For example, if you used a pillow and it’s too bulky, you might need to press it down in order to get to guitar’s head. If you want to avoid this, use smaller objects as support.
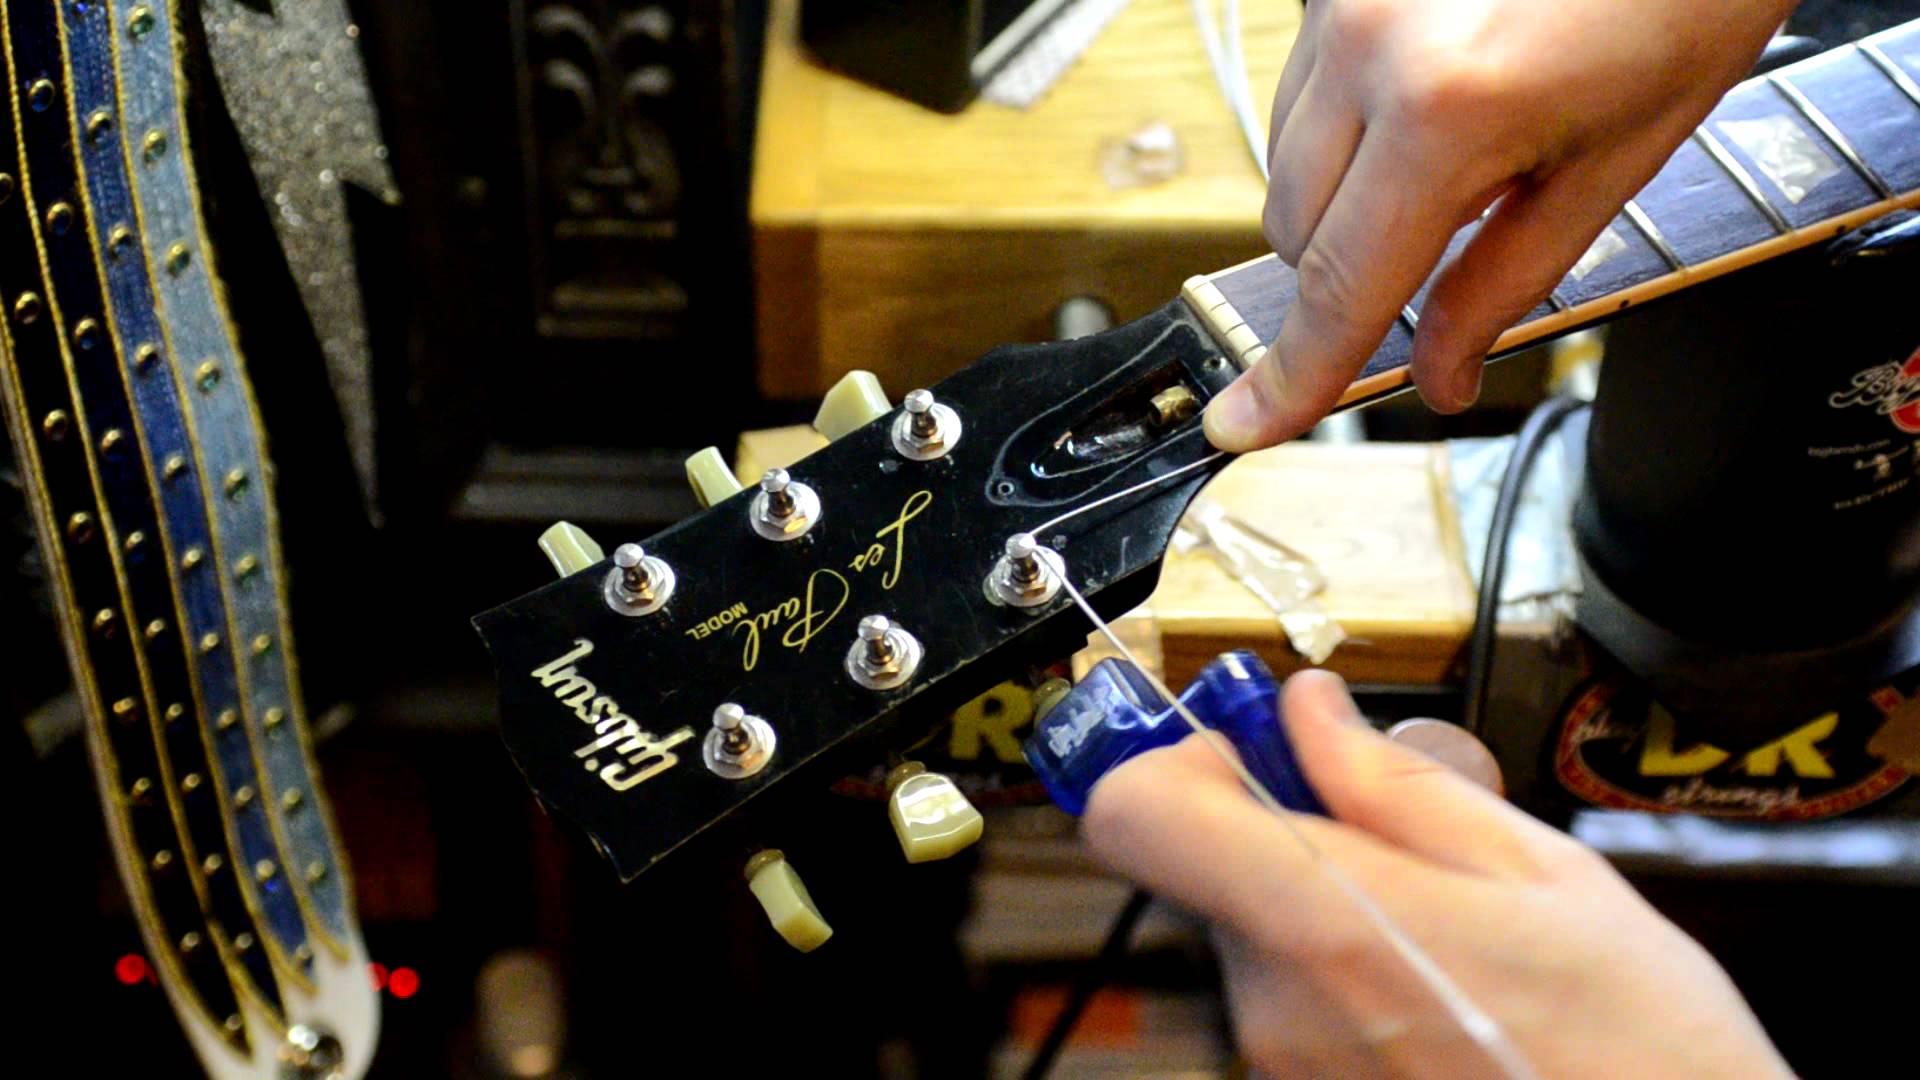
Step 4 – De-tuning and machine heads
The machine heads are also called tuning keys or tuning gears. These hardware pieces are used to tighten or loosen the tension of the strings, which is simply called “tuning”. Now, before you could re-string your guitar, you have to de-tune it. By de-tuning we mean “spin the heads so that the string get loose”.
You’ll have to repeat the process for each string separately. Keep in mind, you should de-tune your guitar slowly, as quick movements might damage older machine heads.
Step 5 – Removing the pins/unlocking the mechanism from the bridge
Depending on the type of the guitar, you should either remove the pins (acoustic guitar) or unlock the mechanism (electric guitar) from the bridge.
Acoustic guitars have safety pins for each string which serve as “anchors”, keeping the strings “at bay”. On the other hand, electric guitars have a locking mechanism (typically guitars with Floyd rose), or none at all. If the latter is the case, un-screwing the machine heads would be sufficient, so this part could be skipped.
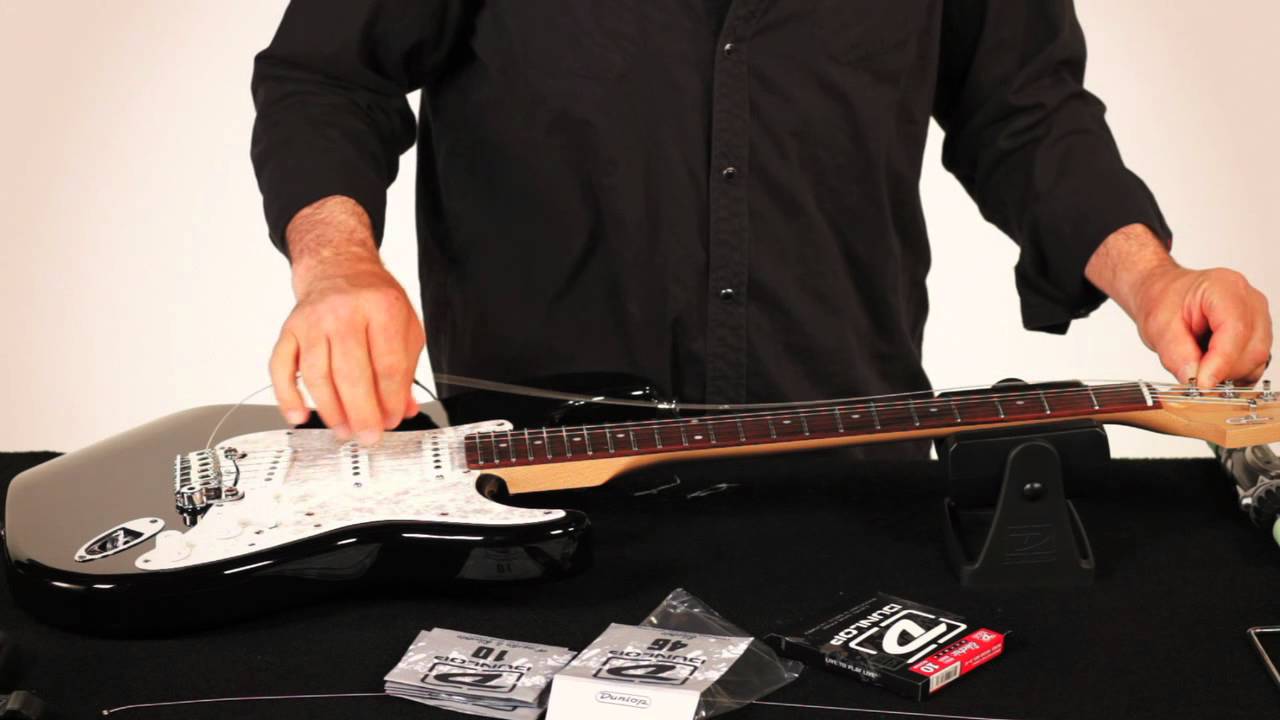
Step 6 – Placing the strings
The only proper way to place the strings is to start at the bottom of the bridge. Pull the strings out from the package as you place each one, and start with the E1. Consult the list below for detailed explanation:
- Place the string in the pin hole and cover it
- Lay the string on the metal bridge bar so that it sits neatly in the groove
- Apply slight tension with the hand that holds the pin (hold the string if it’s electric guitar)
- Pull the string slowly across the length of the fingerboard in the direction of your guitar’s head
- Put the end of the string through the machine heads, press it down the fingerboard as you do
- Tighten the machine heads without releasing the pressure on the string
- Keep tightening liberally until you feel the tension between your finger and the string, but do so slowly else it will snap (note: don’t overdo it – you just need your strings to be slightly tense, you’ll deal with tuning later on).
- Repeat the process with other strings (E1, A, D, G, B, E)
Step 7 – Tune in
Now that you’ve placed the strings in place, it’s time to tune the guitar. Choose the tuning as you see fit (standard tuning is E, A, D, G, B, E, just like the name of the strings). Most musicians can tune their guitars by ear, but if you’re having difficulties, you can use a guitar tuner.
In case you don’t have it, try figuring out the E1 string tuning by ear, and proceed with other strings, keeping in mind that the fifth fret of your E1 string should sound exactly like the open A string (and so on, with the exception of the G string, which should be fretted at the 4th fret instead of 5th).
Conclusion
Re-stringing your guitar is a standard maintenance procedure. It might appear hard at the beginning, but you’ll get better and faster with time. Most beginners tend to get confused with a step or two, especially the tuning part, but don’t get dissuaded even if you don’t nail it in your first try. In the worst-case scenario, you’ll just pop a string or two before you get it right.
Author bio
I’m Anh Vu who has worked sound technology industry for 10 years now. Today, I am an affiliate blogger who likes to educate my audience more about sound technology. Visit to headphonesunder100center.com to find all information about music that you need.
Thanks for this, but what about that cleaning tool? And how about telling us how you put strings on? Long ago, I read an article that said, “Put your strings on right, and they’ll stay in tune.” I’ve followed that article’s advice ever since and my guitar stays in tune; but there seem to be a lot of different theories of what constitutes “right”. What’s yours?