
It’s easy to get yourself thinking “I can’t do _____ because I don’t have the right tools”. In some cases, this is a cold hard fact. While your own two hands may be the best tools on the market, they can’t melt solder, and they can’t chop wood… unless you’re Bruce Lee. That said, the tools necessary to do a job are often not hard to acquire, and may be closer to home than you imagined.
When it comes to setting up or making minor repairs on a guitar, there are some tools you absolutely need to have to do the work. Hex wrenches, allen keys, and screwdrivers are just a few examples. The following is not necessarily a list of fundamentals like these, but more a list of easily attainable items that will help make your job easier and more efficient for various tasks.
1. Kitchen Magnet Bar
While this is of course great for holding your knives and other kitchen tools, many of the tools you will be using on your guitar are made of metal and can be kept organized by putting one of these on your wall. Having metal tools strewn about your work bench is a recipe for making scratches and dents on your instrument, and it’s simply easier to find what you’re looking for when they’re hanging right in front of you. If you plan on doing work for others, keeping a tidy work space is a major selling point for your customers. If I went to drop my guitar off with someone and saw a work desk covered in tools, glue and sawdust, I’d be headed out the door! As a sidenote: make sure the bar is installed a safe distance away from where you’re doing the work. That is, not directly above the guitar… falling tools are even worse than ones on the workbench!
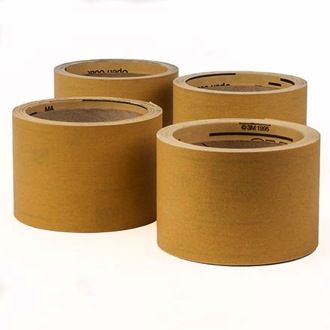
2. Tape
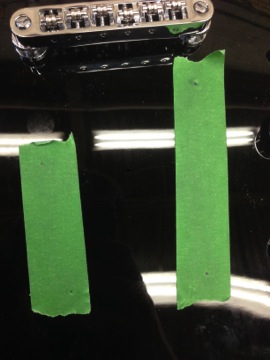
You can use different types of tape for many different things when it comes to guitar work. The best use would of course be for protecting the guitar when you are doing other work to it. We’ve all seen the green tape on the fretboard for when you’re doing fretwork – but that’s not the only use! Electrical tape is a must if you plan on doing any soldering. If you have any bare wires, or want to tie wires together to keep things neat on the inside, a small piece of this is the best way to go. You can use the same green tape you would for fretwork for other protective purposes, too, like if you have to do any sort of drilling into the body (bigsby installations, strap button installations, etc). On top of potential damage from hard tools, glue spillage is something that can cause you more grief in the future, and is best prevented by protecting the area you are gluing with some tape. For example, if you’re gluing in a nut or filling nut slots, lay a couple strips of tape on either side to collect spillage.
Another use would be a quick-fix for loose knobs. If a knob isn’t quite grasping the pot-tabs well enough, you can wrap a small piece of tape around the tab to “increase” it’s size, and allow for a more snug fit.
3. Black Sharpie

It may not be a professional re-touching job, but you wouldn’t believe how often a black magic marker can be used to cover up blemishes. If you’ve got a dark colored guitar with a small paint chip, some black binding with a ding in it, or a dark fingerboard with an imperfection, a simple dab with a black sharpie can virtually make the problem disappear in many cases.
In addition, if not for covering up damage, a marker comes in handy for when it comes time to level and dress frets. Drawing a line down each fret will give you a good reference point of which frets are actually “getting hit” when doing your fret level, and will also be a good indicator of the “crown” on your fret after you start using a crowning file. You can check out an article for more on that here.
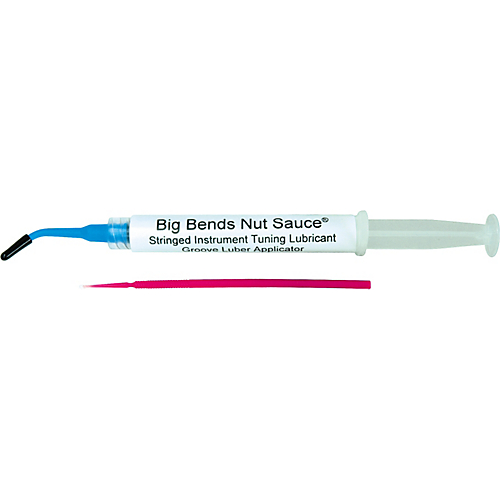
If you find that your guitar is falling out of tune easy, or strings keep “catching” when you tune them, it could be that you need to add a little lubrication to the nut slots. An age-old trick would be filling in the nut slots with a bit of graphite, most easily accomplished by drawing into them with a pencil. It seems silly, but it works! There are also products that exist that work in the same way. such as “Big Bends Nut Sauce”, which works just as well, if not better than the graphite.
5. Glue
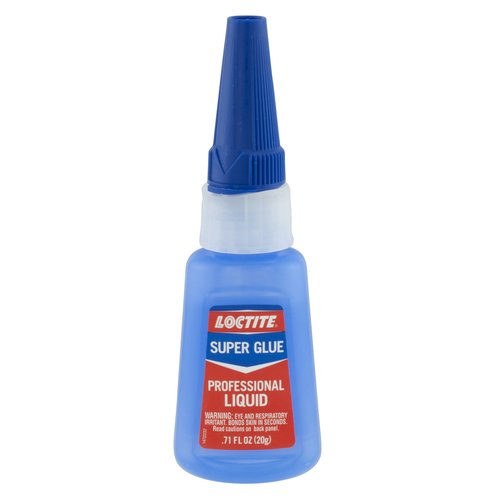
OK, so typically you shouldn’t need glue for your average guitar set-up, and it’s sort of the last thing you want to use when it comes to “minor” repairs – but sometimes it’s necessary. Two types of glue would suffice for general work: a white wood glue, and a super glue. Sometimes frets can lift a bit from use (especially at their ends), and buildup getting underneath them. Before jumping to filing and fret leveling, you’ll want to make sure they are seated properly. An application of super glue with some downward pressure (clamps would be best if you have them) would help seat them, and keep them in place for when it comes time to take the file to it. Another common piece to come loose is the nut. Some would argue that if the nut on your guitar is loose, to just leave it – but I prefer to have it at least secure enough that it will stay on its own without string tension. Not so much glue that you need to saw it out in the future, just a dab; enough that a gentle tap while knock it out. While we’re on the topic of using glue for the nut, it will also come in handy should you find the need to fill in your nut slots. If a string sits too low and causes fret buzz, the simple solution is to use a concoction of super glue and baking soda to fill in the slot, and re-file so the string sits at a good height. An alternative to baking soda would be some tiny shavings of the nut material your nut is made of.
6. Razor Blade
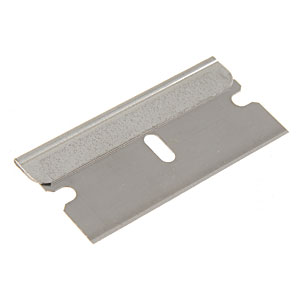
This can be your fingerboard “deep cleansing” tool. You can lemon oil your guitar neck as much as you want – the fact is, sometimes dirt and grime gets stuck in the wood fibers and right close to the frets. In order to get it out, you’d need to get rid of some of the wood that’s holding it in. Here you would use the razor blade as a scraper – stand it up so it’s 90 degrees to the fingerboard, and scrape along the wood-grain (from fret to fret.) You can use sand paper to do the same thing, I just prefer to scrape, and easily get close to each fret with the blade. When finished, some steel wool will help polish up the board, and you can then apply your lemon oil.
7. Sandpaper
As mentioned before, this can be used for cleaning tough spots on the fingerboard like the razor blade. More often, however, sandpaper will be your best friend for everything that involves fretwork. Leveling? Sandpaper stuck to leveling-beam or straight edge. Polishing? Different grits of sand paper, starting from a low grit and working your way to a higher one.
Aside from this, sandpaper makes for a good shimming material if you need it. Save a few strips of your used sandpaper – that way, if you come across a bolt-on neck that needs to be raised at the heel, you can use however much sandpaper you need to act as a shim for the neck.
8. Toothpicks
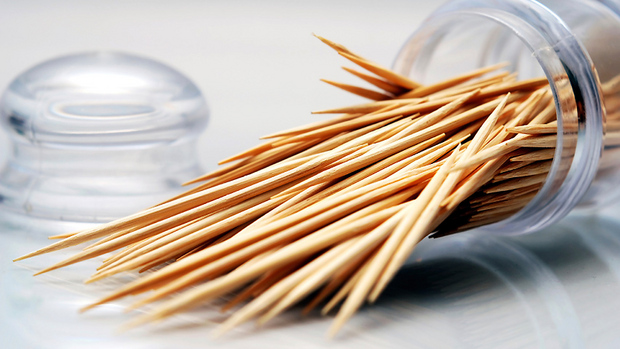
Whenever you have a loose screw, toothpicks can help tighten their bite. Simply remove the screw, and put the toothpick (or part of it) in its hole. Tighten up the screw again, and the toothpick will act as a wood filler, making the screw bite securely into the guitar again.
9. Flat Shoelace
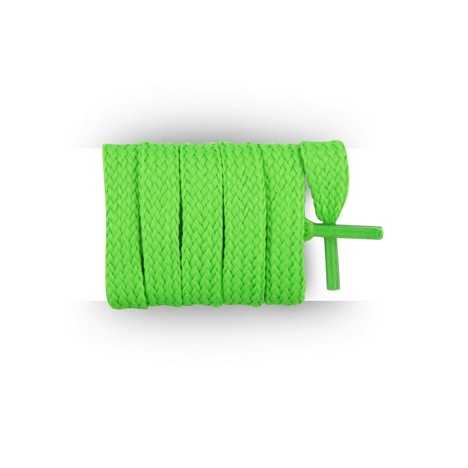
This is a great leverage tool. Sometimes volume and tone knobs are just on too tight to be lifted by hand, and many people would jump straight for a flat-head screwdriver to pry them off. This doesn’t always end so well – plastics can crack or break, and it’s easy to slip and potentially damage the guitar. A flat shoelace slipped underneath the knob will apply even force to its underside, and it’s a soft material so you can pretty much guarantee you won’t end up breaking the knob!
10. Water and Cloth

If you’ve got a guitar that is in desperate need of a wipe-down, before jumping to the WD-40 and chemical cleaners, first try a dry cloth, then a damp cloth. You don’t want to give your guitar a bath here, so be sure to dry any wet spots as you go. In many cases you’ll find this will be enough to get the cleaning job done, and you can add a little guitar polish to shine it back up. As an added note: even before you go at it with the cloth, you may want to blow or use some compressed air to get rid of any particles that may be on the guitar. Wiping the cloth around on it without doing this may drag leftover particles and leave behind nasty surface scratches.
You can also use clear fingernail polish to secure bridge screws from vibrating lose and other applications like securing the nut on the output jack and switch tips that can come off [think Tele or Strat]. Think of it as a low tech Locktite [which I would never use on a guitar]. Just a very small drop goes a very long way.
FWIW – when it comes to lubricating the nut & bridge I prefer Rene Martinez’s Graphital: http://www.texasguitarwhiz.com/products/copy-of-graphitall-white-small
For loose switch tips, knobs and also wobbly trem arms, I like to keep a roll of plumbers’ teflon tape in my gig bag.
A tube of extra fine graphite for locks works great in sticky nuts – I prefer this to any kind of gel lubricant, although Chapstick or a similar lip balm will work in a pinch. Chapstick is also good on string trees, where graphite might not stick around.
Howdy!
My latest fav for cleaning guitars: microfiber cloths. The ones with a fuzzy and a smooth side. You get them at dollar stores. Beats the old wadded newspaper trick.
Second the clear nail polish. Great for minor finish chips too. Coloured polish works great for adding side dots to old guitars that don’t have ’em.
And get yerself both round and flat toothpicks. A couple of dabs of glue and flat toothpicks can reinforce pot/jack holes in guitars that are too wide, easier than using wood veneer…